Table of Contents
- Introduction
- HxR Modules
- Power Supply
- Remote Switch with Inrush Current Limiter
- Assembly of the Amplifier
- Another Mono Power Amplifier
Introduction
07-08-2021
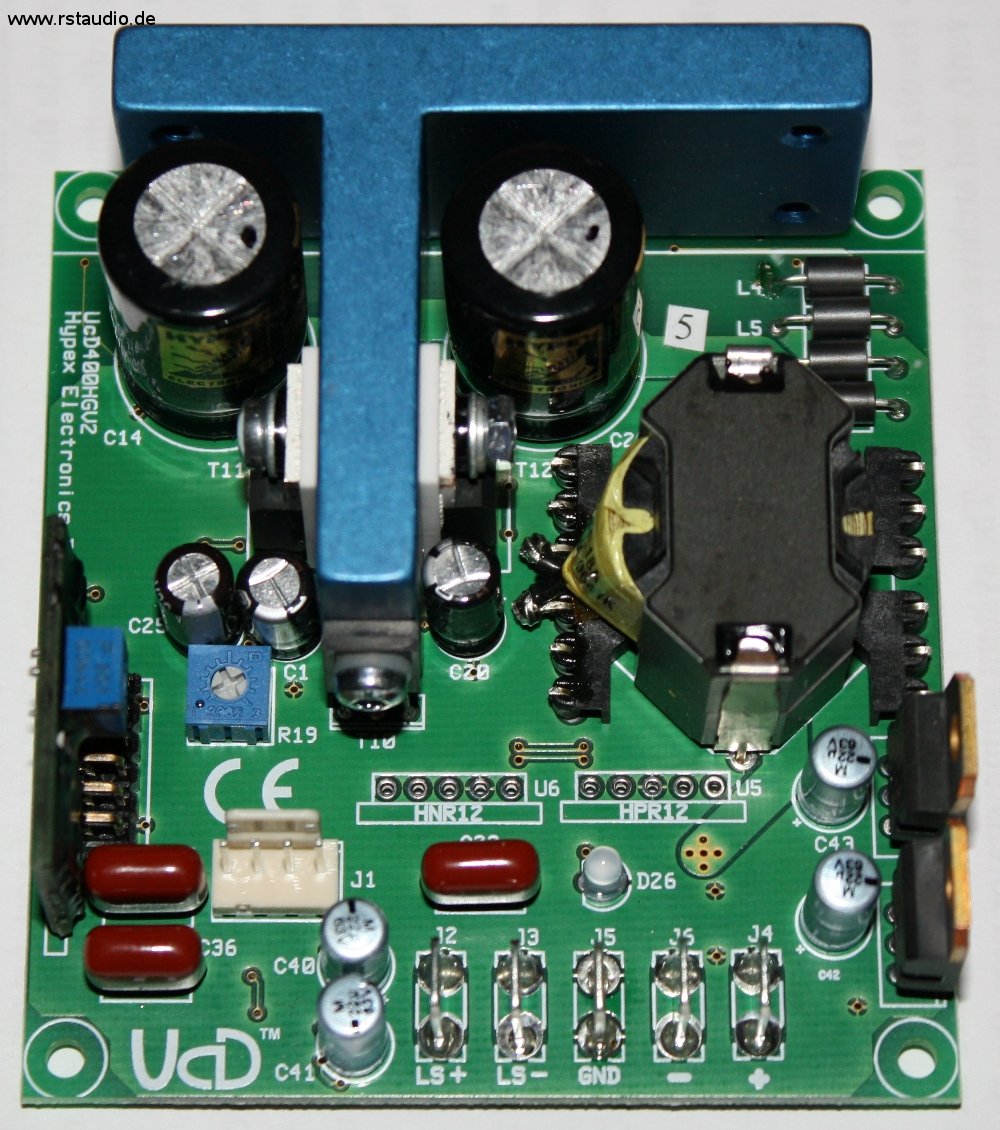
For my RiPol subwoofer I needed a power amplifier with sufficient output power (≥ 150W) at 4Ω. At the beginning of my considerations, the Hypex UcD400 module was my favourite. However, I have always had some discomfort with the class D mode of operation. I then turned my thoughts towards a class AB power amplifier and designed a power amplifier for the subwoofer based on the Pass X5 (Spice simulation, schematic and PCB). By chance, I came across a very inexpensive UcD400HG module at the beginning of 2009 and it was clear that I would give this technology a try as a subwoofer power amplifier.
The following information about the module can be found on the manufacturer’s page:
- Flat, fully load-independent frequency response
- Low output impedance
- Very low, frequency-independent THD
- Very low noise
- Consistent top performer in listening trials including class A and SET amplifiers
- Runs on unregulated ± rails
- Pop-free start and stop control
- Differential audio input
- Overcurrent and overvoltage
- HxR regulator ready
Technology:
The UcD™ circuit is based on phase-shift controlled self-oscillation, with only a single voltage feedback control loop taking off at the loudspeaker terminals. The control function is constructed fully out of passive components, with only the comparator standing in for gain.
| Item | Symbol | Spec. | Notes |
|---|---|---|---|
| Output Power | PR | 400W | 4Ω, THD = 1% |
| Distortion | THD | ≤0.03% typ. ≤0.005% typ. | P0 < ½PR P0 = 1W |
| Noise | Un | 30µV typ. | |
| Frequency Response | <10Hz – 50kHz | +0dB, -3dB | |
| Output Impedance | Z0 | <20mΩ <150mΩ | f = 1kHz f = 20kHz |
| Efficiency | η | >92% | |
| Supply Ripple Rejection | PSRR | 65dB | both rails |
The operating parameters of the UcD400HG module are ideally suited to drive my RiPol subwoofer and the balanced signal input also fits very well into my concept.

HxR Modules
07-08-2021
As an option to the Hypex module described above, there are also the two voltage regulator modules HPR12 and HNR12 from Hypex. The manufacturer himself writes:
The HxR series regulators are high performance voltage regulating components targeted at performance-critical audio applications. Key performance parameters exceed that of industry-standard integrated circuits by several orders of magnitude. Kelvin sense connections provide point-of-load (local) regulation without requiring physical proximity.
Since I had to order the UcD signal cable for the input signal from Hypex anyway, I decided to order the two HxR modules as an extension for my UcD400HG amplifier.

Power Supply
07-08-2021
The power supply unit has a classic design. The symmetrical secondary voltage of the 600VA toroidal transformer is rectified by the bridge rectifier (D1…D4) and buffered with a total capacity of approx. 88000µF (C1…C6). At the output of the power supply there are 2 fuses (4A fast) according to Hypex specifications. An LED can be controlled via R1. R2, D5, D6 and C7 connect the ground to earth and ensure that there is no earth loop.
- Circuit Diagram of the Power Supply
Remote Switch with Inrush Current Limiter
07-08-2021
Since larger toroidal transformers (from approx. 500VA) have too large inrush currents for normal house fuses, it is necessary to ensure that the current is limited at the moment of switch-on. With the help of the circuit described here, the output stage is switched on – directly or via remote signal – and at the same time the maximum current is limited for a short time.
The output stage is switched on either by the relay Rel1 or by a mains switch between the terminals J3/J4 and J7/J8. The relay Rel2 is not switched directly after start-up and so the current flows via the resistors R1…R4. These limit the current to approx. 5.75A. Via C1, BR1 and R7, the capacitor C2 is slowly charged and switches on the relay Rel2 after it has reached the switch-on threshold. The current limiting resistors are then bridged.
Relay Rel1 is switched on via a remote voltage. This voltage must be permanently present and should not fall below 9V. This voltage is fed via J13 to the voltage regulator IC1 which regulates the coil voltage to a constant 6V.
Each unit in the remote chain generates its own remote output signal with which the following electronics are then switched on. This signal is applied to the output with a time delay (approx. 3s) and thus guarantees that all units are activated one after the other. This ensures that the total inrush current is not too high.
A unipolar secondary voltage of 9V is connected to terminals J16/J17, rectified with BR2 and buffered by C8. The capacitor C10 is slowly charged via R10 and switches on the transistor Q3 through R13 and thus also the MOSFET Q1 with a time delay to the voltage at C8. Q2 and R8 provide a limitation of the output current (Iout = UBE / R8).
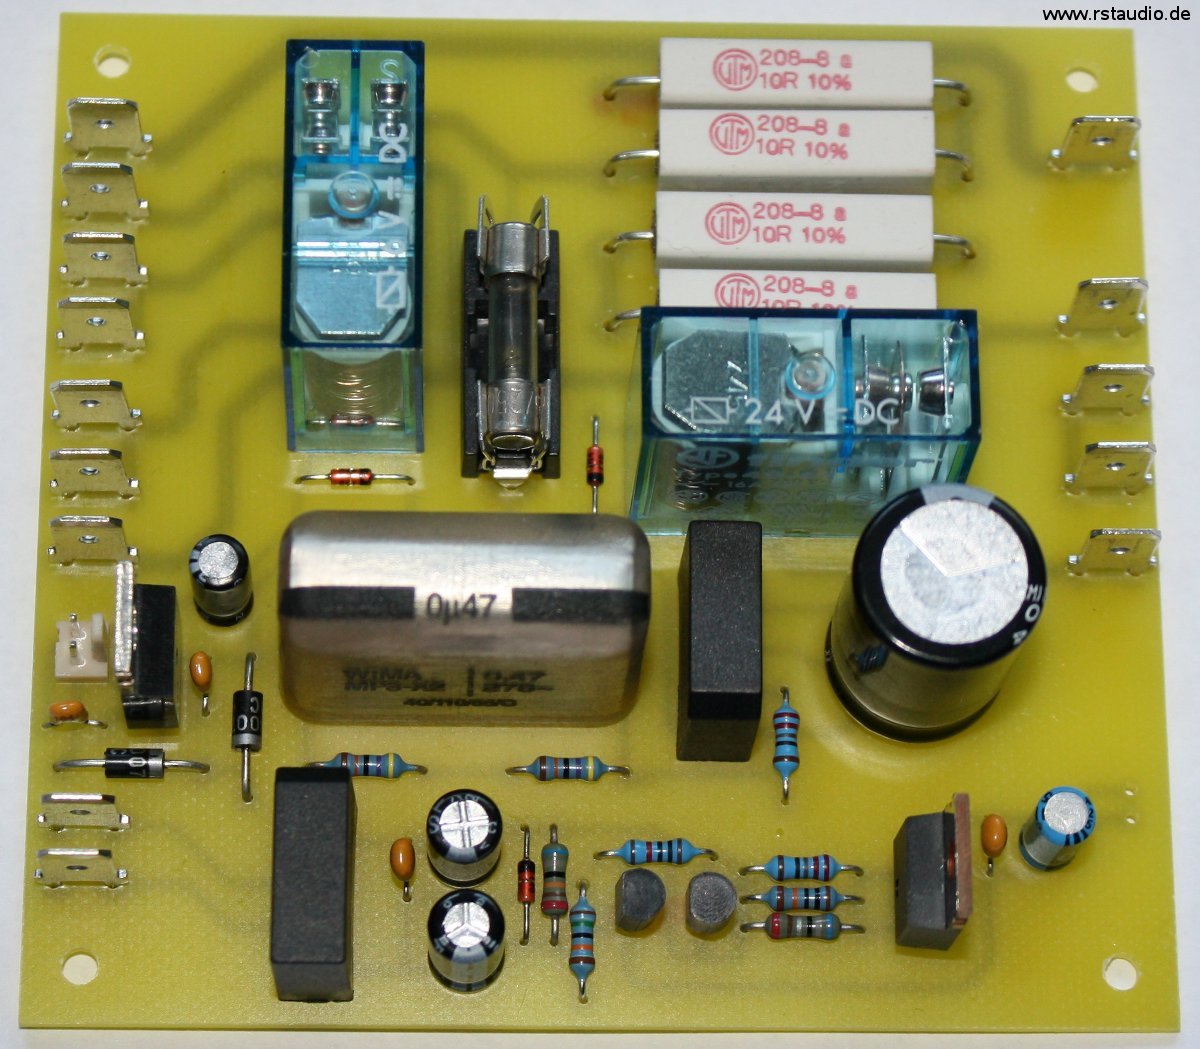
- Schematic of the Power Switch
- Schematic of the Remote in & out
- Top Overlay of the Board
Assembly of the Amplifier
07-08-2021
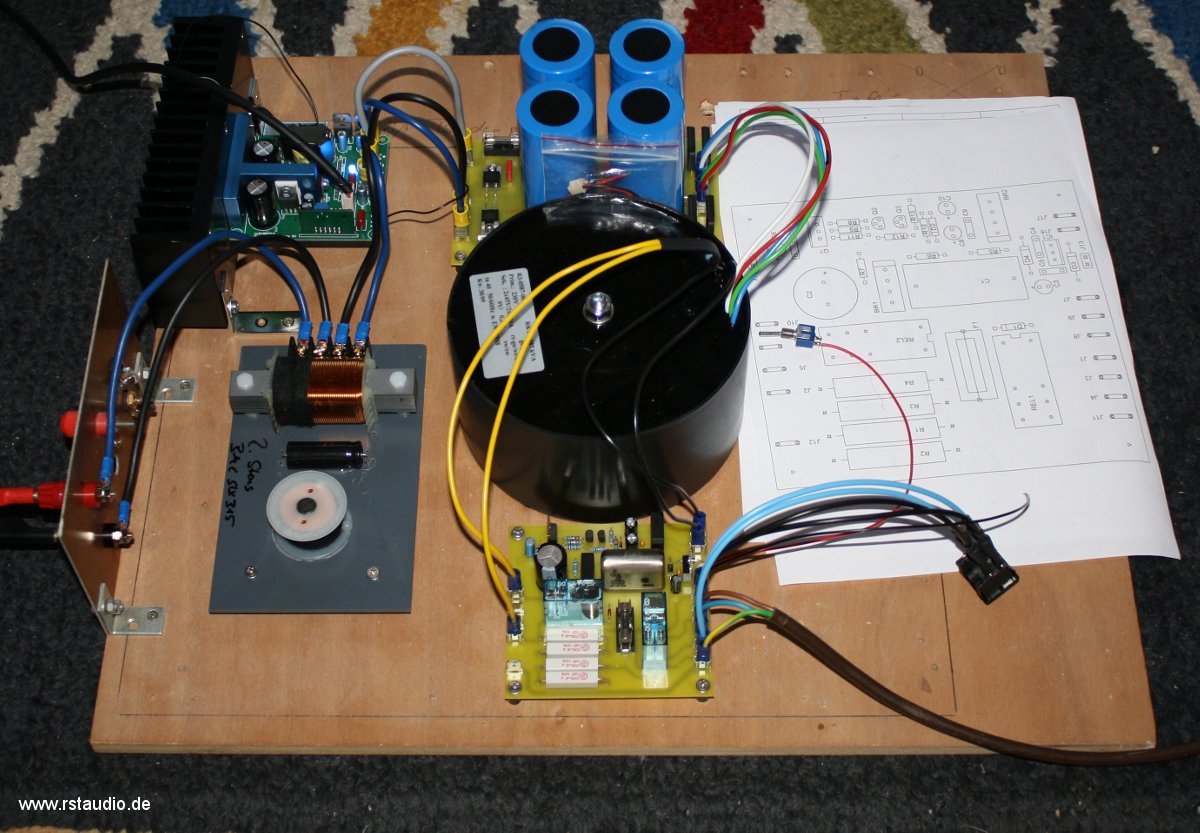
For the first commissioning and tests, I mounted the entire amplifier on a wooden board. At the top left you can see the Hypex module on its heat sink. Below is the compensation circuit of the RiPol subwoofer, which is located between the output of the module and the actual amplifier output. The encapsulated 600VA toroidal transformer is mounted centrally in the middle. Above this is the power supply unit with the rectifier and four 22000μF electrolytic capacitors. The circuit board below the transformer is the power-on electronics described above.
After all the necessary components had been bought and assembled and the prototype went into operation, I started thinking about a cabinet. It should be as small as possible, but I also wanted to accommodate the compensation circuit of the RiPol subwoofer. In the end, I couldn’t find anything suitable on the market, so I decided to build the enclosure myself. Since I have access to a Datron milling machine, building a cabinet shouldn’t be too difficult and the result would certainly look quite nice.
The following components of the power amplifier must be housed in the enclosure :
- Hypex UcD400HG Modul with HPR12 and HNR12 voltage regulators mounted on a heat sink
- 600VA toroidal transformer
- power supply with 88000µF overall capacity
- 230V/AC DC filter
- remote switch with inrush current limiter
- RiPol compensation network
- connectors for all in- and output signals
I screwed the Hypex module directly onto a heat sink, which is then in turn attached to the rear wall of the enclosure with 6× M4 screws.

The base of the enclosure is a 4 mm thick aluminium base plate. The transformer is screwed to this plate by means of buffered spacers on a second mounting plate. This suppresses all mechanical noise from the transformer. The power supply unit and the DC filter are also attached to the mounting plate.

The side panels are made of 3mm thick black anodised aluminium. The circuit board with the remote switch-on is attached to the right-hand side panel. This results in very short lines for the 230V/AC wiring.
The rear panel is made of a 2.5 mm thick black anodised aluminium plate. On the left side of the rear panel (seen from the front) are the audio connections, in the middle the actual Hypex module is mounted and on the right side are the connections for the 230V/AC supply and the remote switch-on. All electronic components have been arranged in such a way that the supply lines are as short as possible.
The compensation circuit for the RiPol should be mounted on the left side wall. However, during the installation it turned out that the transformer interfered with the coils, causing a hum in the RiPol. For this reason, the compensation circuit could not be installed in the housing of the power amplifier and is therefore electrically connected in its own small housing between the RiPol and the power amplifier.
Another Mono Power Amplifier
05-04-2021
At the beginning of 2020, my friend Jürgen asked me for a Hypex mono power amplifier for his subwoofer. In addition to the actual Hypex UcD400HG module and the mains transformer, I needed three more components to build a complete power amplifier:
- one 230V/AC DC-Filter
- an inrush current limiter
- an Analog Power Supply Unit
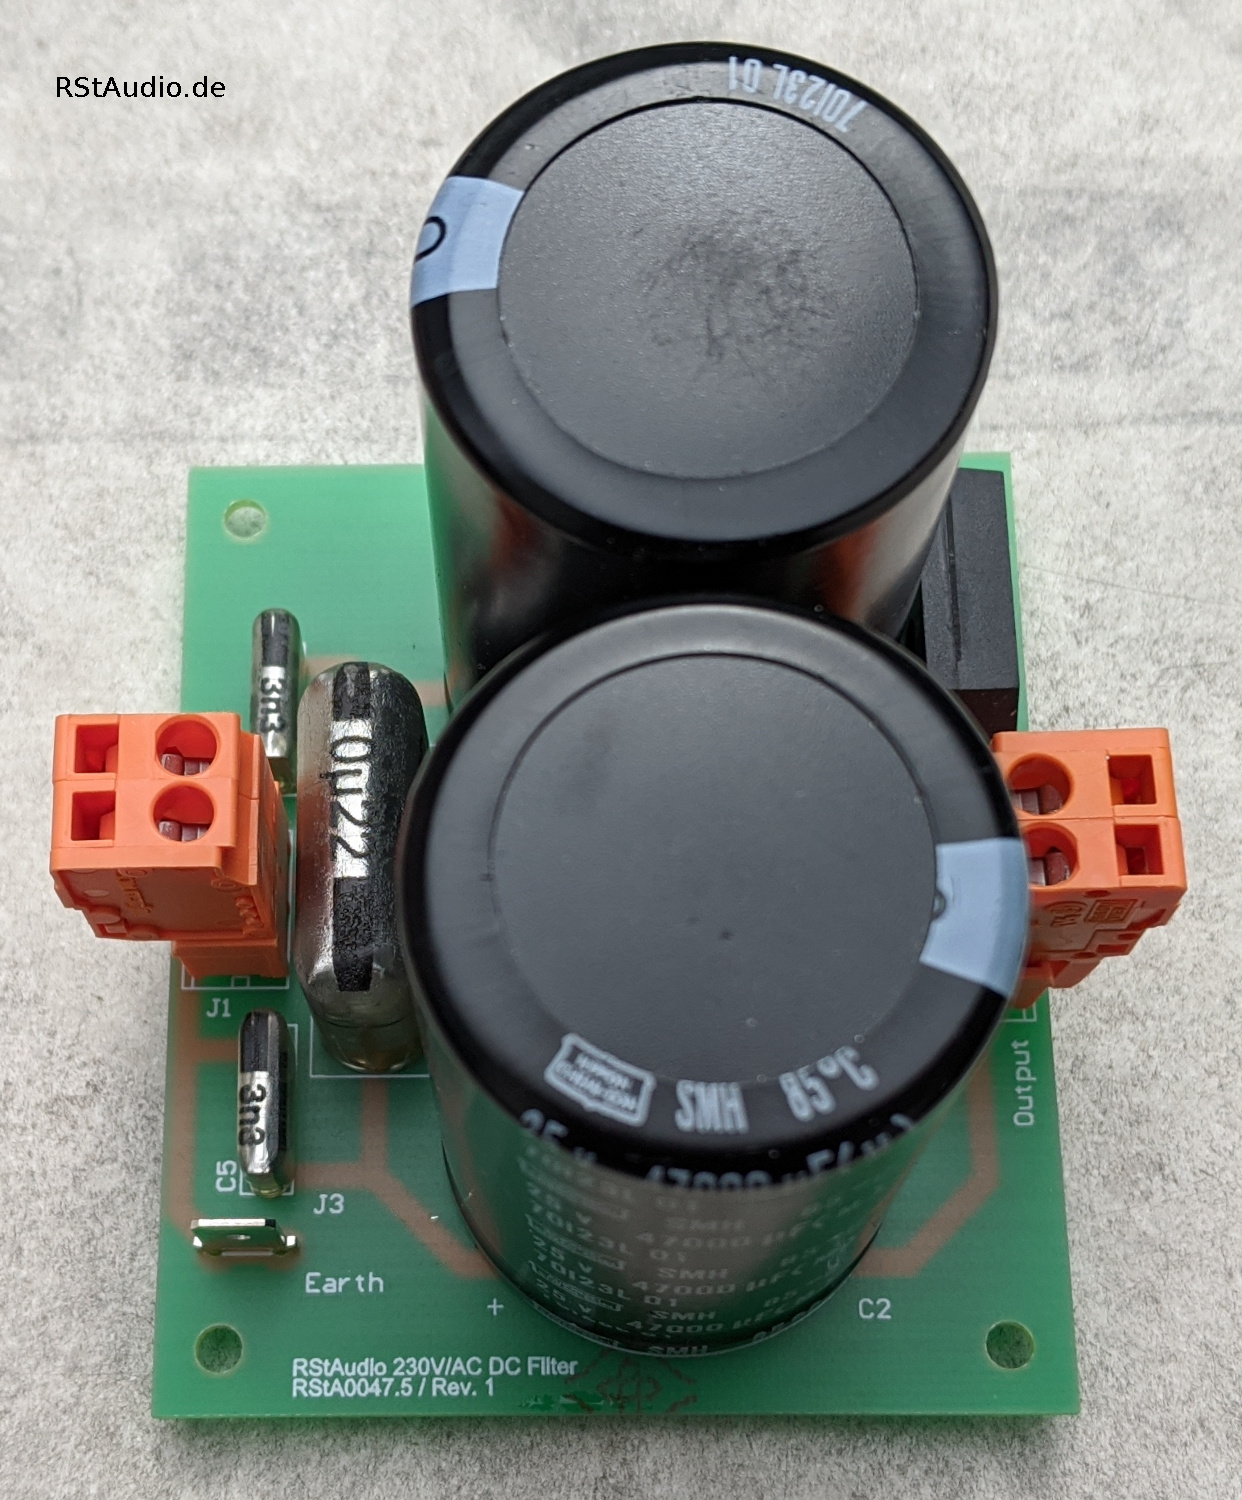
For the DC filter I used the RStAudio XOno 2019 project. The board is constructed in such a way that even much bigger capacitors than needed for the XOno 2019 can be placed. Here it is 2× 47000μF electrolytic capacitors.
I took the inrush current limiter from the ES3 project (see above), but here in the version I used in the ES4. Thus, this power amplifier also receives my remote on/off control.

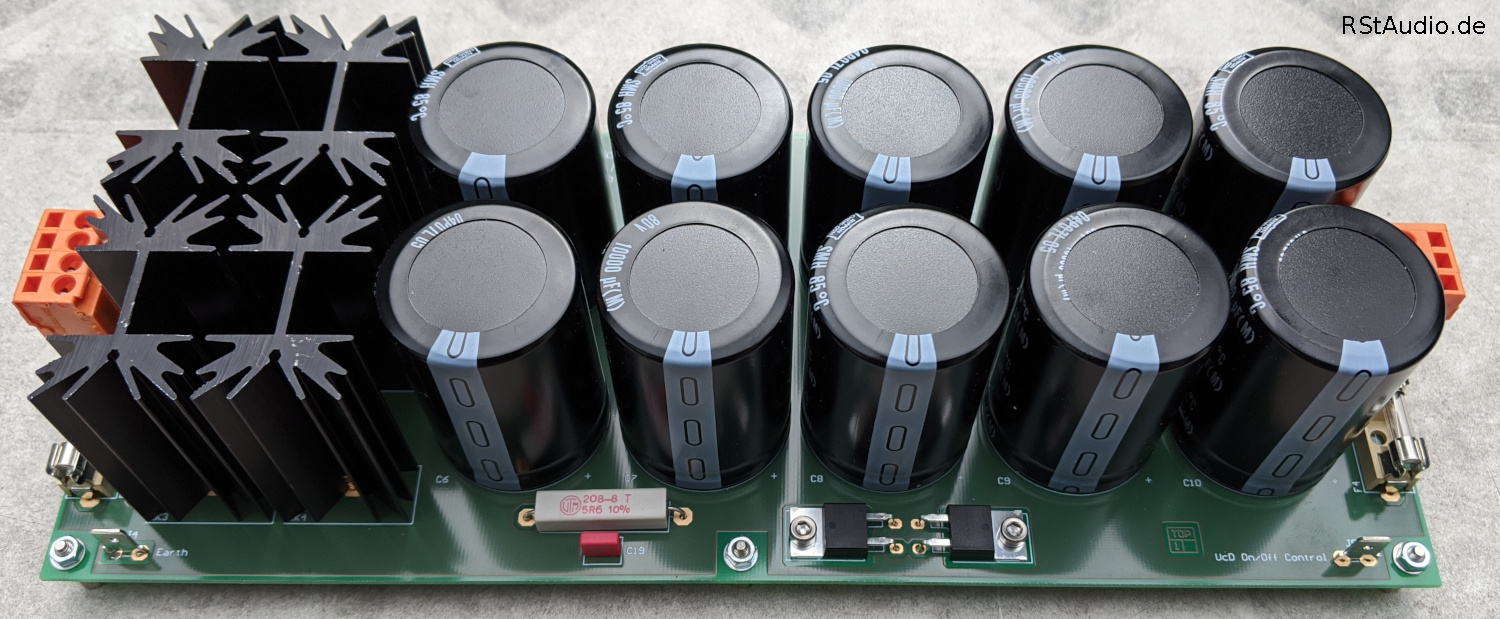
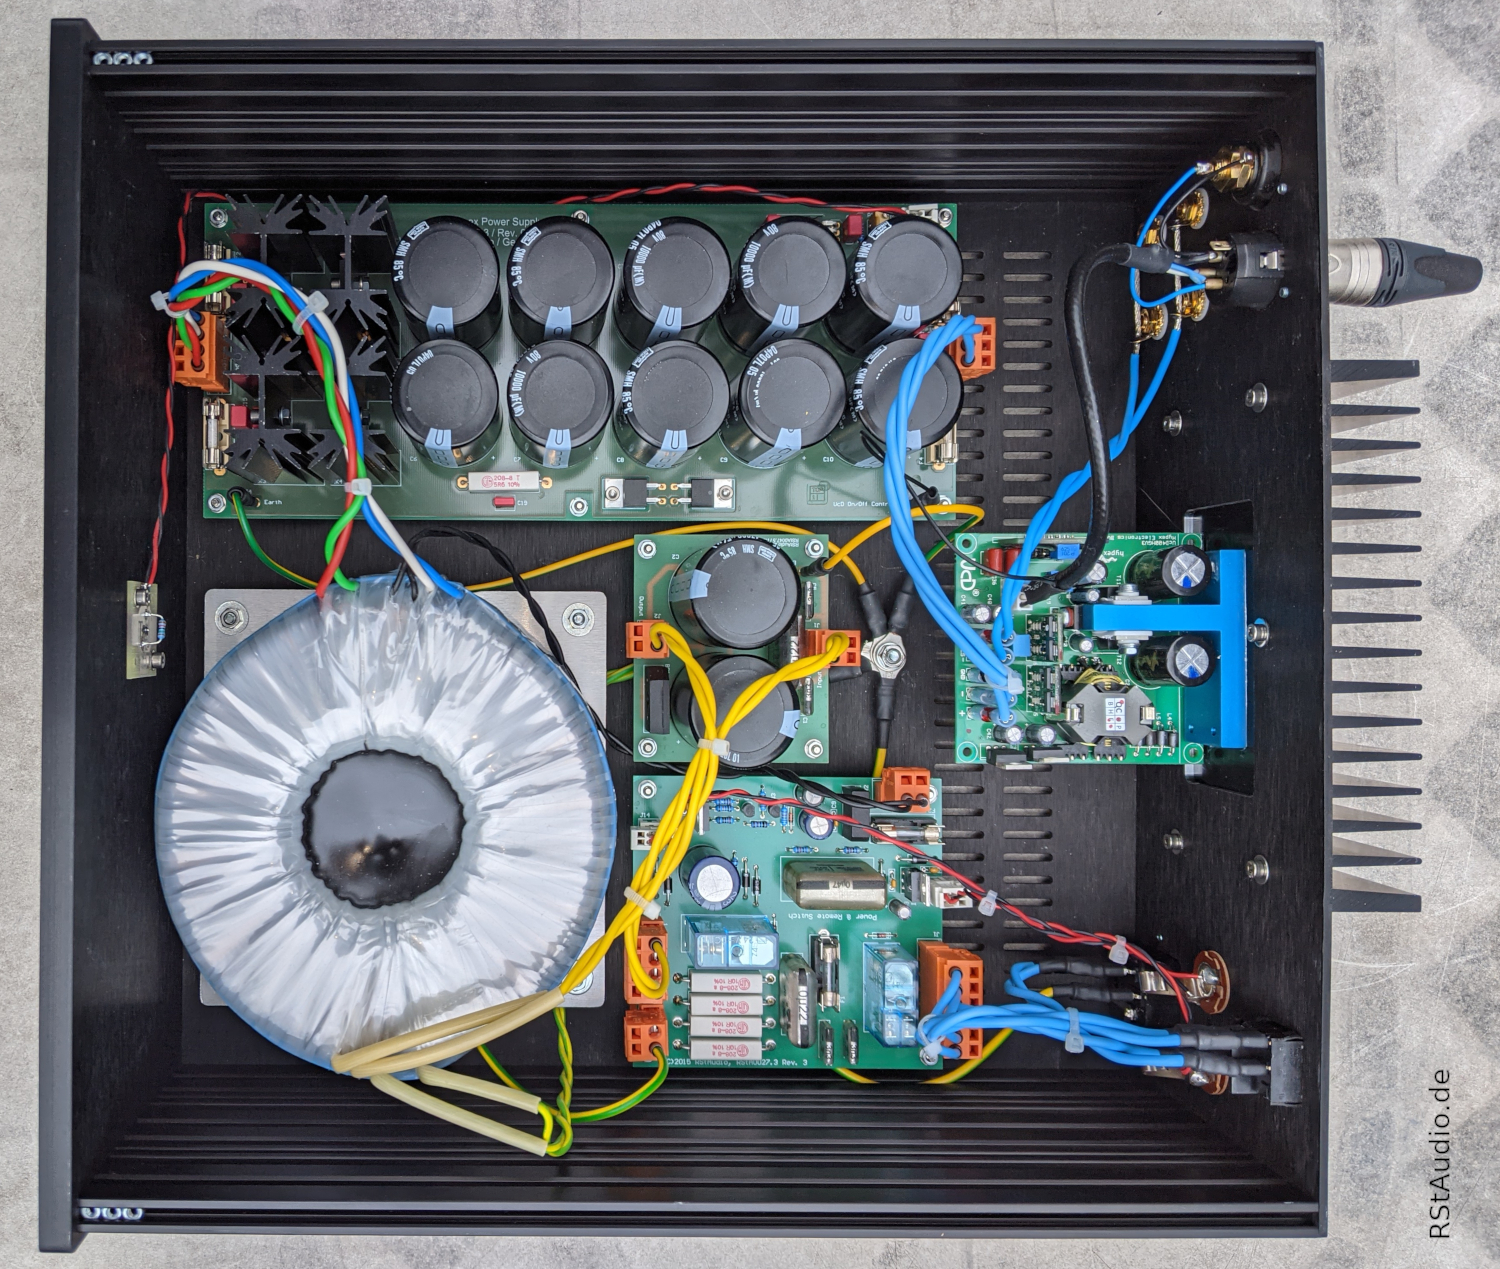
For the analog power supply I designed a new circuit board. It consists of snubber networks, ultra fast soft recovery diodes in the bridge rectifier and a capacitor bank with 10× 10000μF electrolytic capacitors. The ground-earth connection is made, as always with me, specifically via a diode-resistor network.
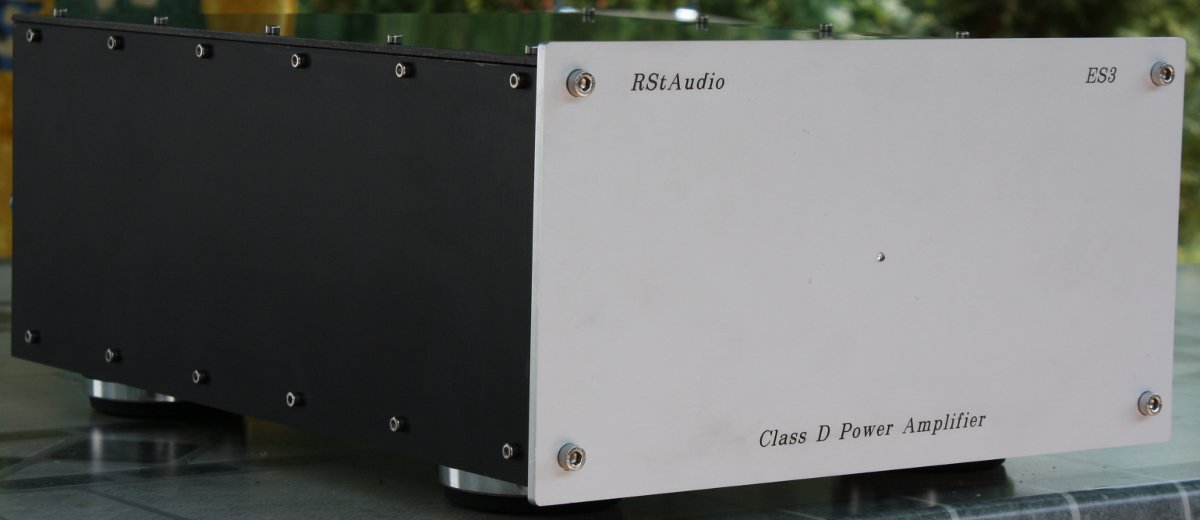
In March 2021, the time had finally come for the power amplifier to make its first sound with my RiPol subwoofer. The picture below shows how I installed the components. The transformer sits on a mounting plate that was insulated from the base plate with a rubber buffer – although this is not really necessary with Müller Elektrotechnik transformers. On the rear panel you can see a short-circuit plug that is needed for unbalanced operation.
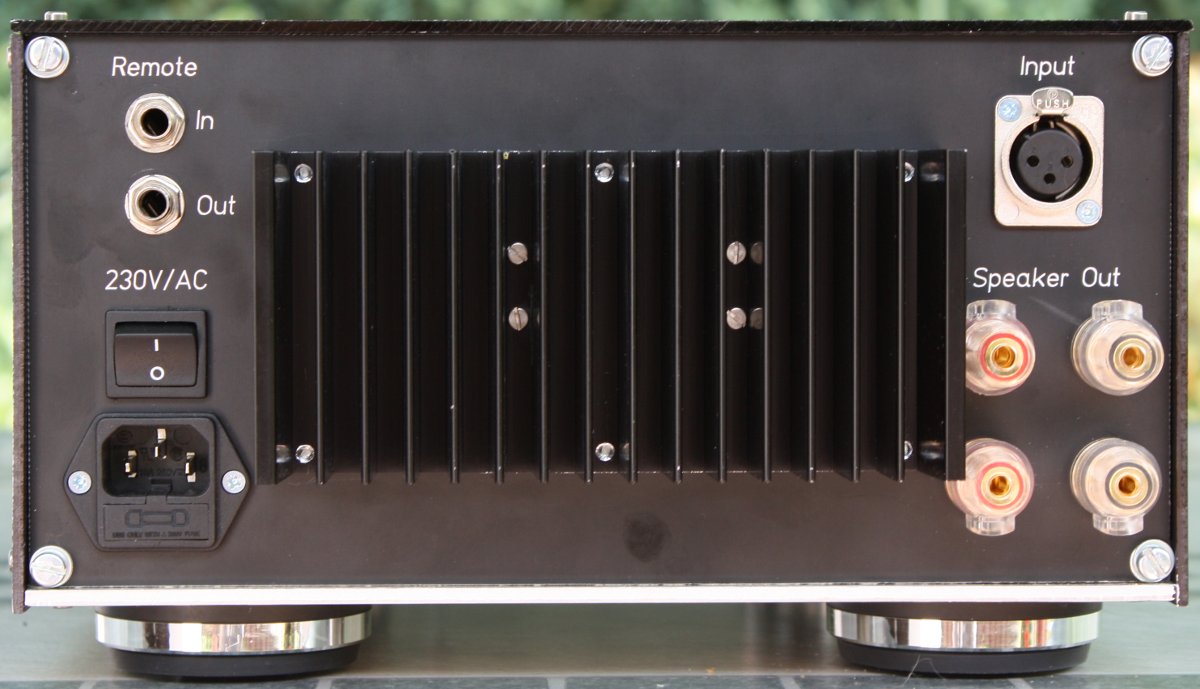
The next picture shows the rear view. On the left you can see the mains socket and the mains switch, in between are the input and output of the remote on/off control. The heat sink with the Hypex module is mounted in the middle. The heat sink is overdimensioned; even when the maximum output power is used, it does not get warm. On the right side are the audio connections. You can drive the power amplifier balanced or unbalanced. In the second case, you need the above-mentioned short-circuit plug, which is then plugged into the XLR socket. The loudspeaker sockets are double and connected in parallel, very useful when operating an RiPol.
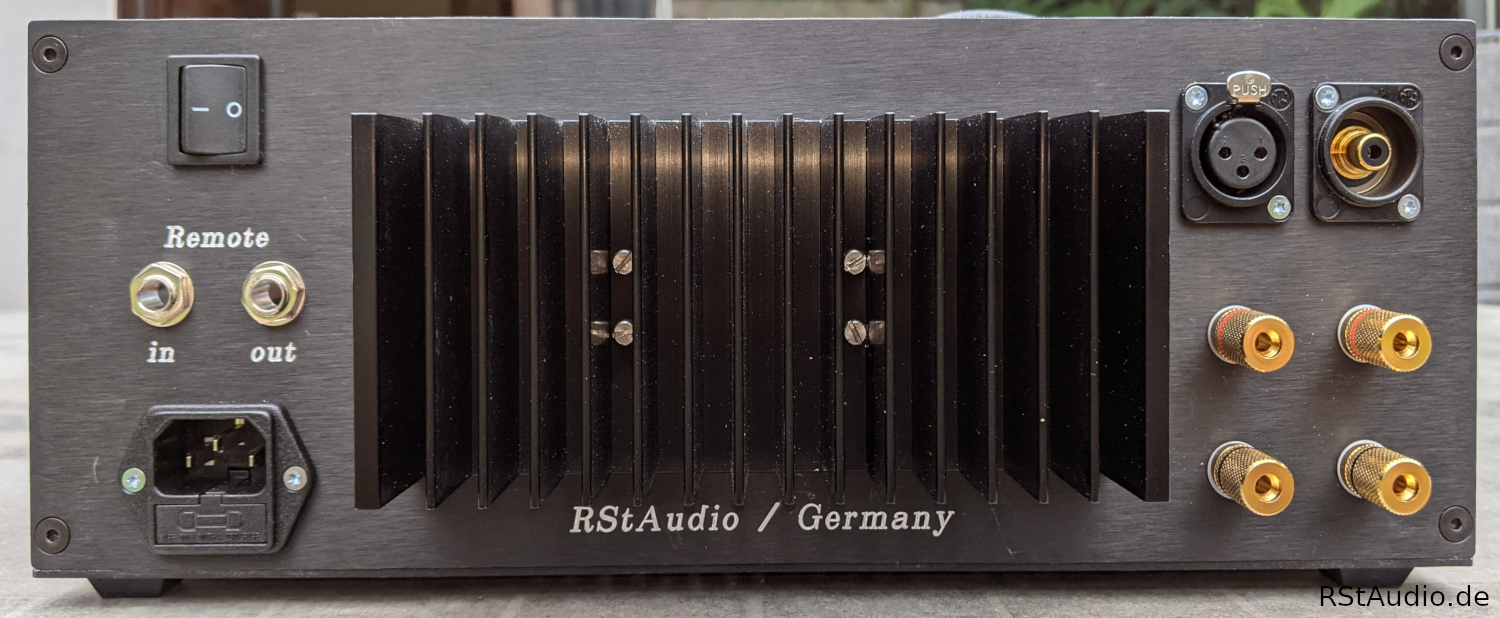
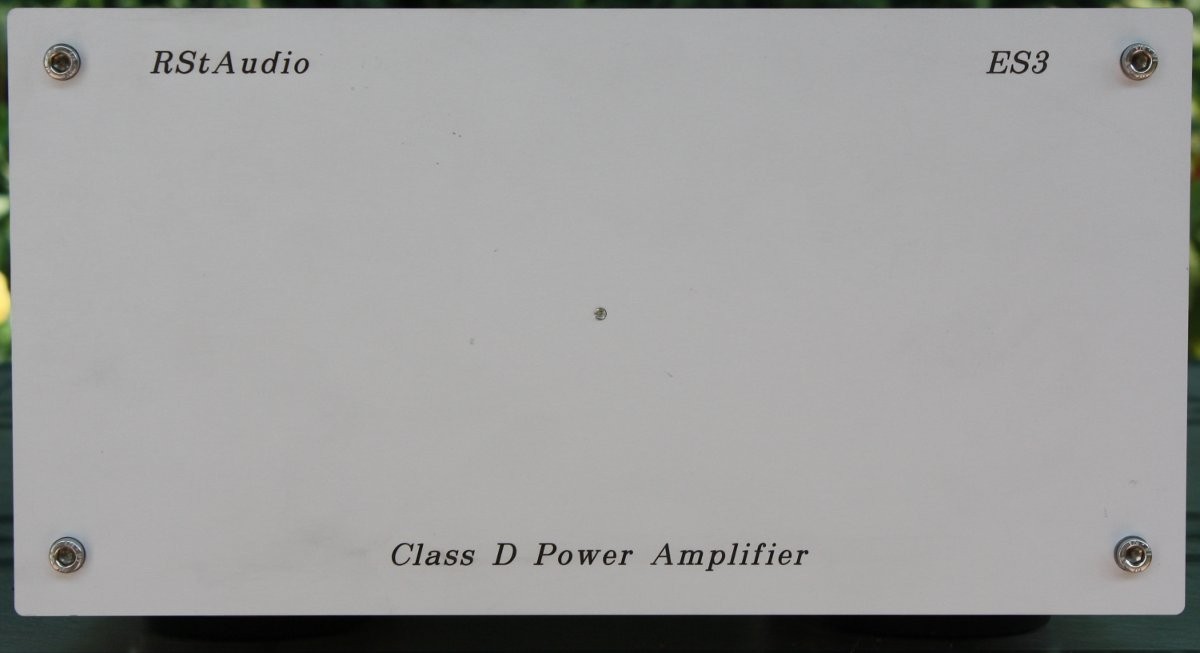
I have not taken a photo of the front, at the request of my friend Jürgen there is only a light emitting diode in the middle.