Table of Contents
- Introduction
- Main Board with RIAA Equalization
- MC Prepreamplifier
- XOno MC Prepreamplifier
- Audiophile Performance
- Update 2022
Introduction
22-04-2018
Since 2005 I work with the XOno phono preamplifier of Pass Labs and now it was time to use the experiences gained over the years to develop my own discrete phono preamplifier – the RStAudio DPV1. It is based on the conclusion that there is a lot to improve in the XOno circuitry and of course has the genes of this excellent phono preamplifier in it. Finally I wanted to see what I could get out of an optimized design of this circuit topology.
The following list contains the essential technical features for the development of the DPV1:
- DC Coupling from input to output
- mixed passive (75μs) and active (318μs, 3180μs) RIAA equalization
- discrete amplifier stages
- 2 pluggable MC preamplifier
- discrete voltage regulators
- all adjustable values can be switched by relay
Although I do not have the schematics, there will be similarities and matches with the XP-25 and the Xs Phono preamplifier of Pass Labs. These two phono preamplifiers are also further developments of the XOno.
on the 10-04-2018 the DPV1 has taken over the place of the XOno in my VV5 preamplifier
Shortly after the first release of this page I already got some requests for this phono preamplifier. The reproduction is quite difficult because 28× 2SK170BL and an equally large number of 2SJ74BL – most of the parts have to be matched – are needed. In addition, the relays can only be controlled via a microcontroller circuit. That’s why my DPV1 will remain a unique piece for now. There will also be no publication or distribution of circuit diagrams.
Main Board with RIAA Equalization
12-04-2018
The main board is designed to have exactly the size and holes of my XOno boards in the VV5 preamplifier. So I can replace this board directly and without major modifications – only the software in the microcontroller has to be adapted.
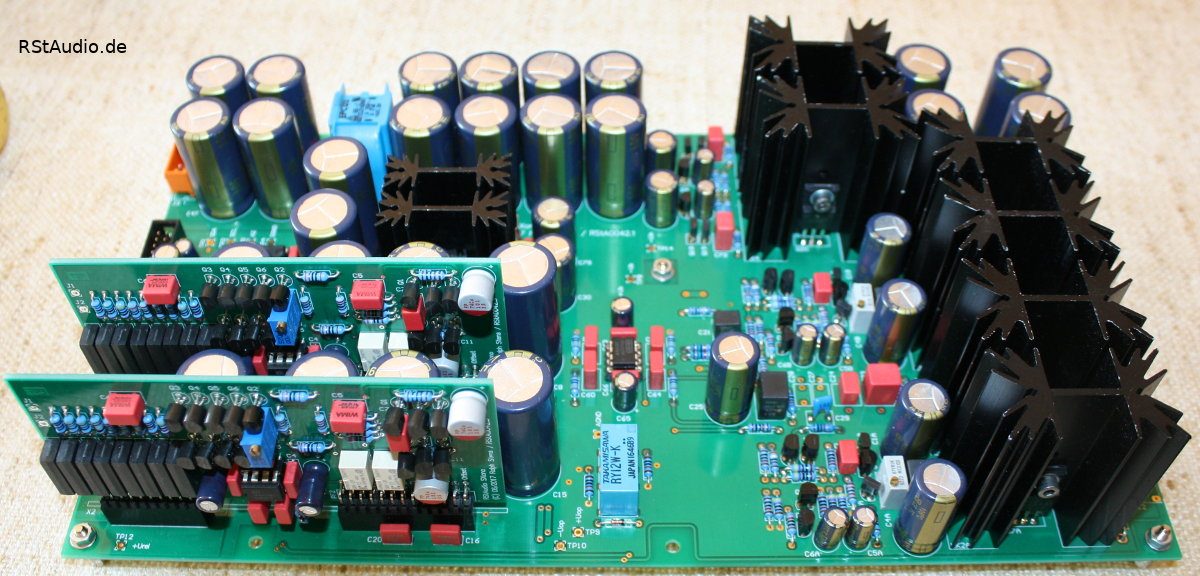
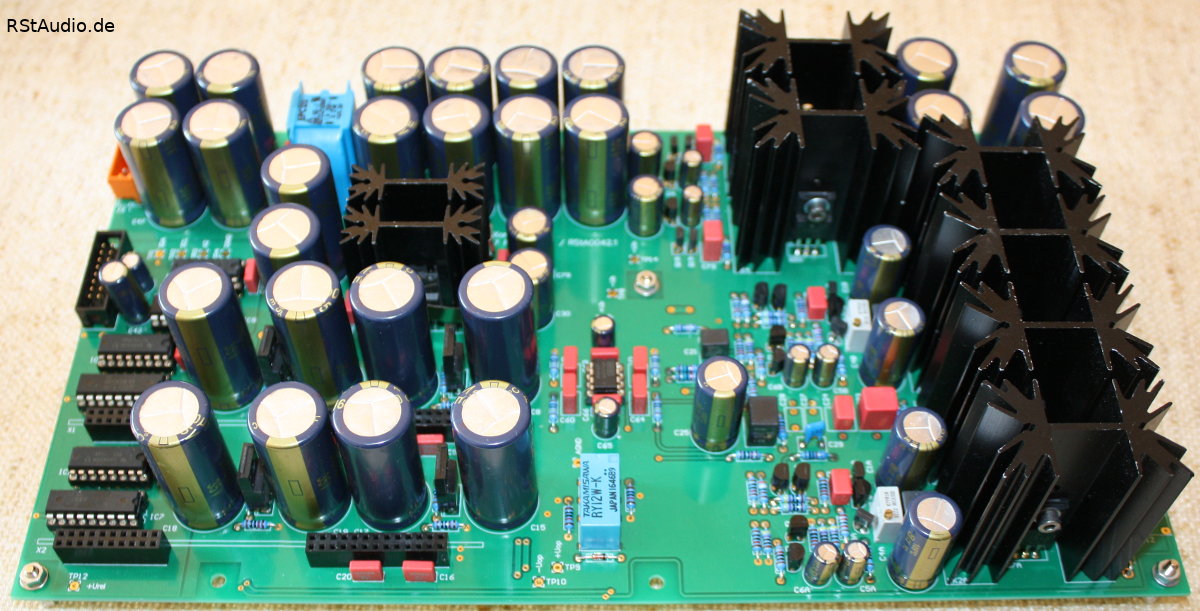
This board contains the following components :
- slots for 2 MC preamplifiers
- passive 75μs input filter
- discrete amplifier with 40dB gain incl. RIAA equalization (318μs, 3180μs)
- discrete inverting amplifier for generating the balanced output signal
- two servo controllers for DC stabilization of the discrete amplifiers
- passive low impedance 50kHz low pass filter at the output
- DC supply voltage input with CLC filtering
- discrete voltage regulators with optimized circuit topology
- digital control of all relays
The amplifiers are discrete operational amplifiers with exactly the same design except for their respective feedback. The input of these amplifiers is formed by a low-noise JFET differential amplifier with cascode. The output stage is operated with a high quiescent current for sound reasons and therefore corresponding heat sinks are required on the board. In addition, there are two current source at the output which ensures single ended class A operation with low level control. Because of the use of servo-controllers I can omit coupling capacitors at the outputs.
There are 2 slots for preamplifiers on the board. These are always required when using MC pickups due to the additional amplification needed. But even when using an MM system, because of the passive 75μs filter at the input, it needs at least a low-noise buffer – due to my preference for MC systems, this is more of an academic consideration for me. The output signal of these two boards is switched by a relay directly before the input of the RIAA amplifier. Both plug-in boards have their own additional voltage post-regulators at their slots.
As usual with my designs, all relays are controlled via an I²C bus. This ensures that no digital signal is transmitted if nothing is switched. An influence of the sensitive phono signals is thus excluded. In addition, the digital ground is completely separated from the analog ground.
MC Prepreamplifier
12-04-2018
At the input of the MC preamplifier there are switchable resistors adapted to the pickups I use. They are connected to ground by means of relays. This allows adjustments of the input resistance for the connected moving coil pickup to be made over a wide range.
As the first amplifier stage, 4 n-channel JFETs connected in parallel and also 4 p-channel JFETs connected in parallel are used. Both circuits have an additional cascode on the common drain. It is therefore a complementary single ended input stage. The self-noise level of the stage is significantly reduced by the parallel connection.
The input stage is followed by a complementary output driver also with JFETs connected in parallel. The amplification of the entire input stage can be switched. The DC offset is set to the smallest possible value with a trimmer and can also be actively controlled by a servo controller. For the servo-controller, I used a very high-quality audio operational amplifier at this point.

XOno MC Prepreamplifier
11-02-2019
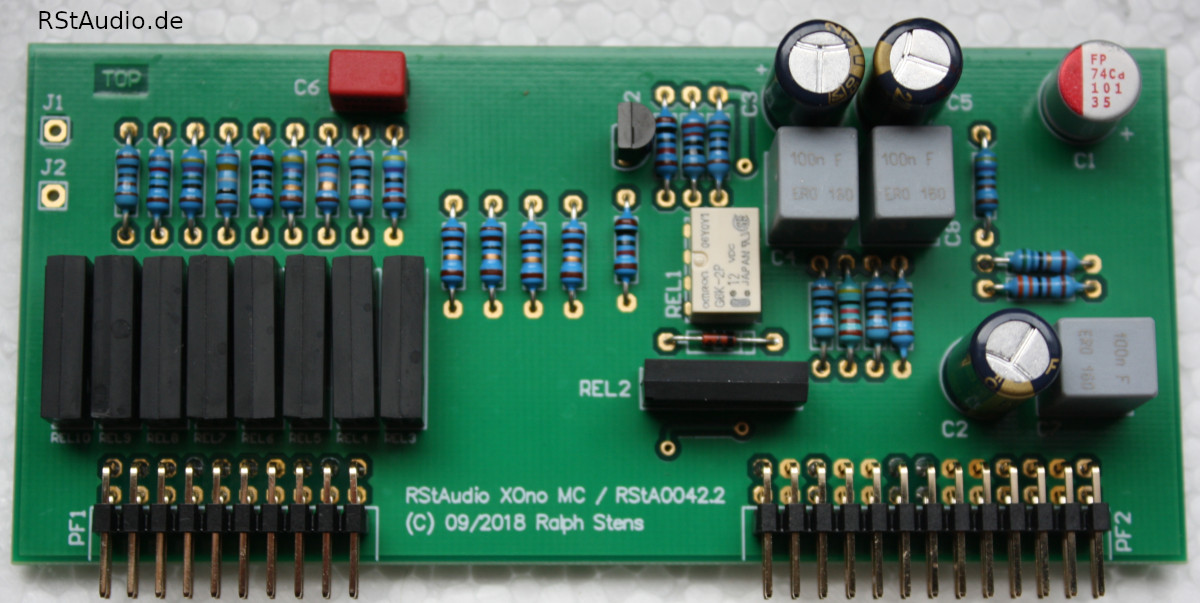
It is well known in the scene that the gold dust, meaning the 2SK170GR and BL, are slowly running out and therefore it is becoming more and more difficult to build e.g. a XOno. However, Toshiba still has the double JFET’s 2SK2145 in production, also in a GR and BL version. I used these JFET’s in the input stage of the discrete operational amplifiers (see above).
So why not try using the 2SK2145 for a XOno MC stage? Thus I designed a module which realizes such a stage. The interfaces are of course identical with the MC module described above and therefore I can test such a XOno module in the DPV1.
The disadvantages of the 2SK2145 are also not ignored here, the forward transfer admittance is clearly smaller (15mS) than with the 2SK170 (22mS), which can be compensated by a larger number of JFET’s, however. In addition, the source connections of the two JFETs are internally connected and lead out with a common pin. This of course limits the application possibilities.
I replaced each 2SK170 with a 2SK2145. Thus 8 JFET’s are connected in parallel instead of only 4 in the original input stage. The same applies to the JFET at the output. The double number of JFET’s of course changes the operating points which I have adjusted accordingly. This reduces the noise of the stage considerably and I compensate the smaller admittance.

Audiophile Performance
12-04-2018
How does this phono preamplifier sound compared to the XOno?
The first thing you immediately notice is the silence when the needle is lifted. This phono preamplifier is completely noiseless at a set gain of 71dB. After about 5 hours of intensive listening it is clear that there is no way back to the XOno. But of course there is still play in time needed to make a final judgment.
06-05-2018
A few weeks have now passed since commissioning. The break-in time was shorter than with a XOno, which is certainly due to the missing coupling capacitors. The DPV1 is much quieter than my previous XOno. The fine detail resolution has improved once again. The music comes with an incredible intensity, musicality and precision as I have never heard it before from vinyl. I claim unmodest that it’s the best phono preamp I’ve heard so far – and there were already some really well slandered ones there. As already described above, there is definitely no way back for me.
17-04-2019
I have now operated the XOno MC modules in input 2 of the DPV1 for several weeks and could compare them directly with my MC preamplifier (see above). The noise of the modified XOno MC stage is at the same low level as with my stage. The sound characteristics are very similar, but my MC stage is a bit more open. The differences are marginal and can only be heard in direct comparison. With the XOno MC stage described here, I could perfectly live and as a replacement in a XOno with available components, it is excellently suited.
Update 2022
10-01-2023
When I planned my new 10 channel preamplifier VV7 the DPV1 should be part of the project. Of course, since the development of the DPV1, I had some ideas which parts could be improved. However, most of the changes are rather cosmetic and add nothing to the audiophile performance.
In the years after the development of the DPV1 I made some experiences with regulators for the supply voltage. In the DPV1 I use the discrete Pass regulators, which I preferred for many years. In the meantime, however, I use modified Jung regulators in various places and am impressed by the performance.
From these considerations I developed the DPV1R2 as a component of the VV7, the biggest change was the power supply. All information about the DPV1R2 can be found on the page of the preamplifier VV7.