
Introduction
November 10, 2019
When I met my friend Heiner in 2013, it was the first time I had consciously listened to a system that uses active room correction — an unforgettable experience. At the end of 2013, we measured my listening room for the first time, and the measurements made it clear to me that I needed to take action — especially in the frequency range below about 100Hz.
I’ve spent quite some time exploring passive solutions, such as Helmholtz Resonators, but I’ve never been entirely convinced by such designs. The operating frequency is determined by geometric parameters, and tuning them to the room is correspondingly complex. Furthermore, in the frequency range where I need them, they become too large for my small listening room.
The breakthrough came in mid-2015 with an article by Nelson Pass from 1988 describing an Active Absorber (AA). There was even a corresponding product from Phantom Acoustics, whose promotional brochures cited patents dating back to the 1950s. Even today, with Bag End’s E-Trap, there is at least one ready-made product available for purchase, though we believe its purely analog solution is limited in its capabilities.
We decided to build such a system and integrate a DSP, with all its capabilities, into the signal path.
Hardware Description
October 24, 2019
Prototype
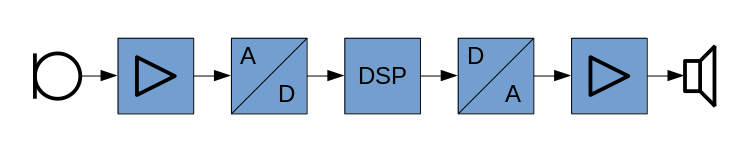
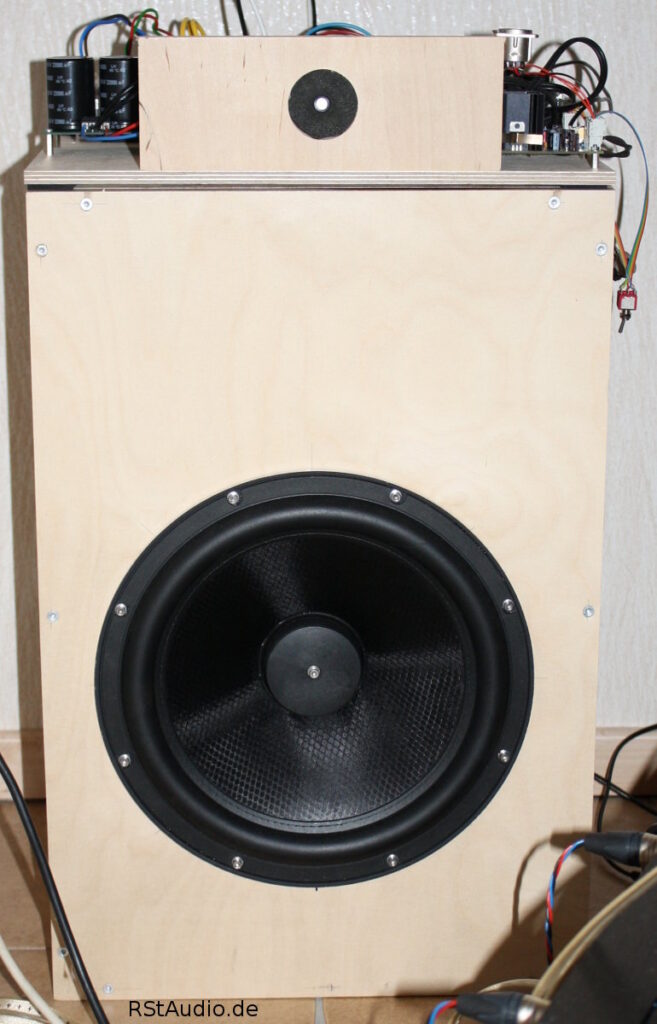
At the beginning of the signal path is an omnidirectional microphone built into the front of the AA. The signal from this microphone is amplified by a microphone preamp to the input level of a miniDSP 2×4 HD. At the output of the DSP board is another analog stage to match the levels of the power amplifier module. At the end of the electronic chain is the power amplifier with an output power of approximately 100W/8Ω, which drives a 30cm bass driver in a sealed enclosure.
To calibrate the electronics, the individual components must be adjusted to match each other in terms of volume; this is done during commissioning on the lab bench. A volume control is provided for adjusting the system to the room. The acoustic measures are calibrated based on measurements taken in the room at the listening position. The DSP is then programmed according to these results.
Absorber Electronics Revision 2
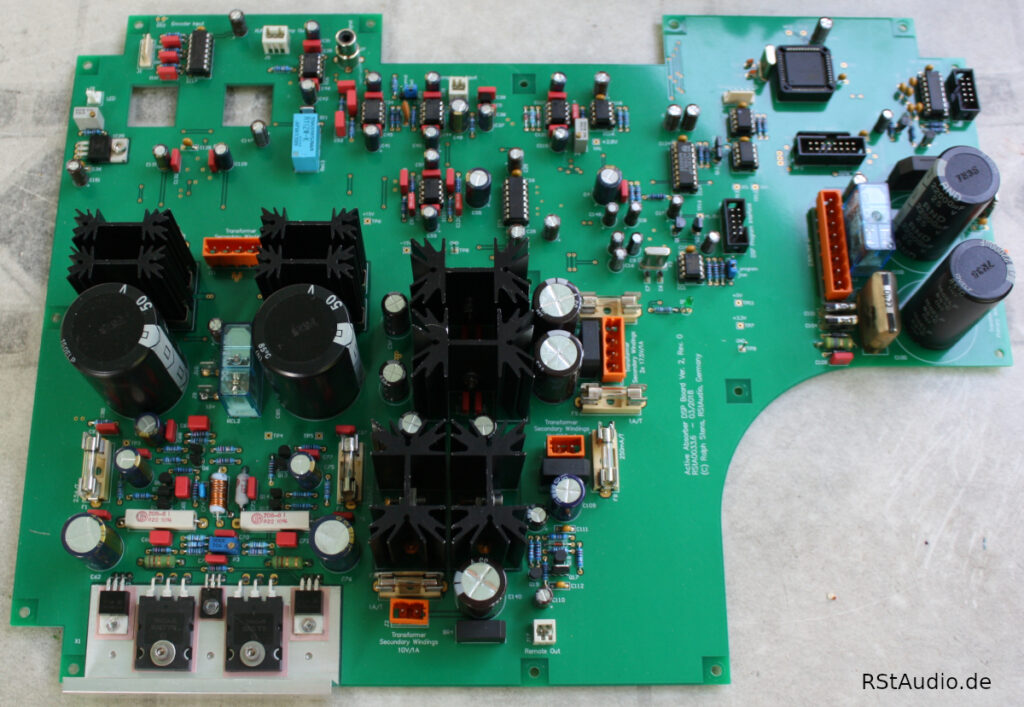
Now that two prototypes have been operating successfully in two rooms for over a year, we have decided to build a final version of the electronics. The main difference from the setup described above is that we have omitted the miniDSP board; consequently, we had to design a circuit using a DSP chip ourselves. We have also incorporated a microcontroller into the design. All general settings can now be adjusted using the μC with the help of a rotary encoder and a display. In particular, the levels after the microphone amplifier and before the power amplifier can now be set reproducibly using digital potentiometers. The DSP is programmed independently of the μC; there is a corresponding programming interface on the board.
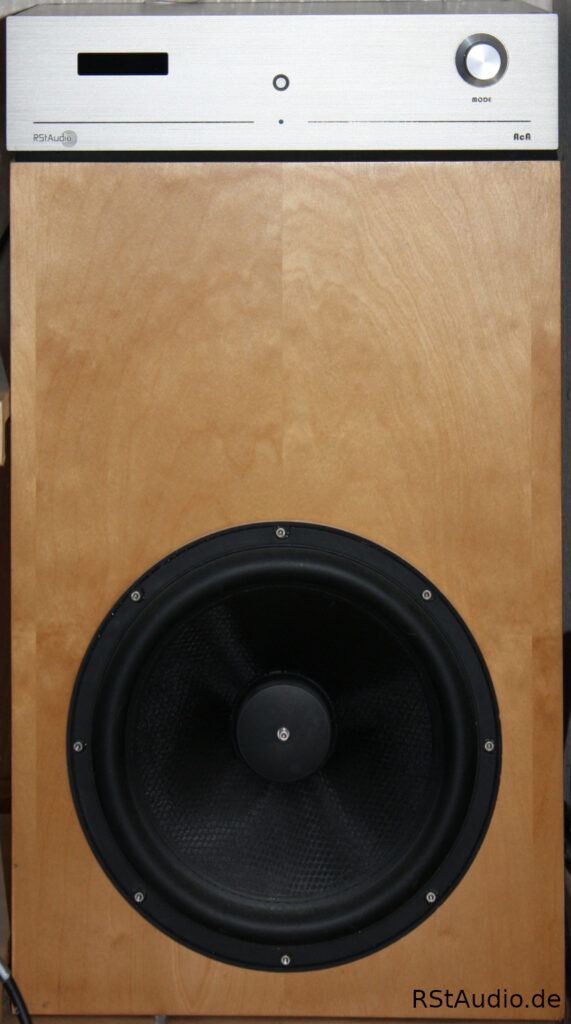
The photo below shows the complete absorber. The electronics are mounted directly onto the speaker enclosure, creating a single unit.
Calibration of the Absorber
October 29, 2016
Heiner has been using Acourate by AudioVero as his measurement software for room measurements for quite some time. He uses it to optimize the digital crossover filters for his system and correct the room response. Acourate is a very powerful tool that allows users to measure reverberation time starting at 30 Hz, among other things.
My listening room has a classic rectangular layout. The Quads are positioned about 1 meter in front of a long wall and are angled toward the listening position. We placed the active absorber in the left corner of the room behind the Stacked Quad. Its front is aligned parallel to the long wall. From the listening position, I would therefore be looking at the right side wall if the AA weren’t obscured by the Quad.
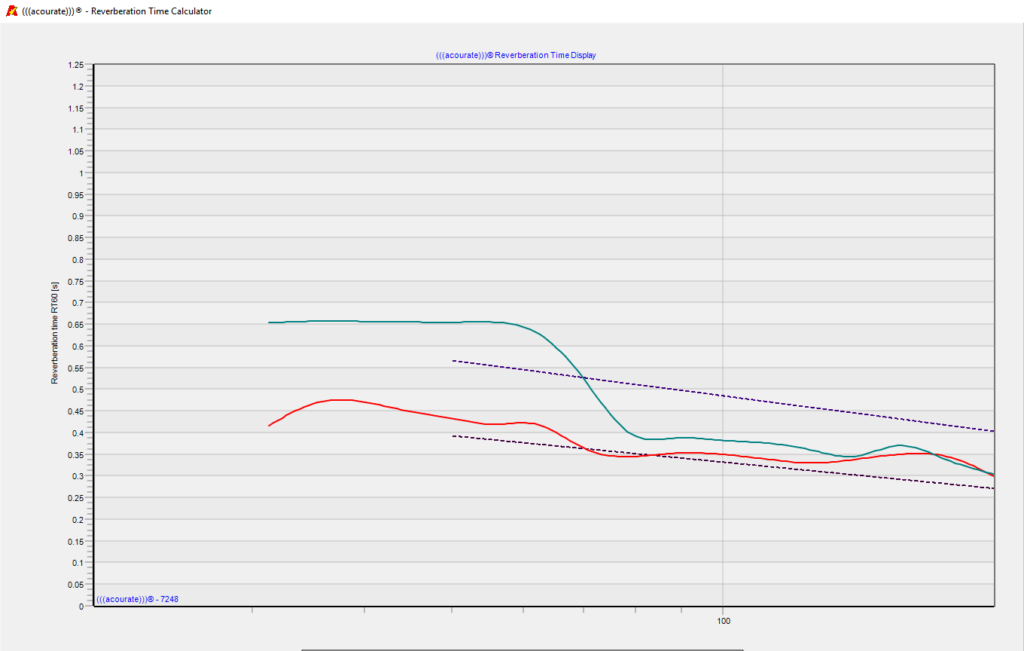
For the first DSP setting, we inverted the signal picked up by the microphone and fed it to the AA’s power amplifier. The result is shown in the figure below. The x-axis shows the frequency between 20Hz and 200Hz, and the y-axis shows the reverberation time in seconds. The green curve represents the measurement of the room without AA, and the red curve represents the result with the AA setting described above.
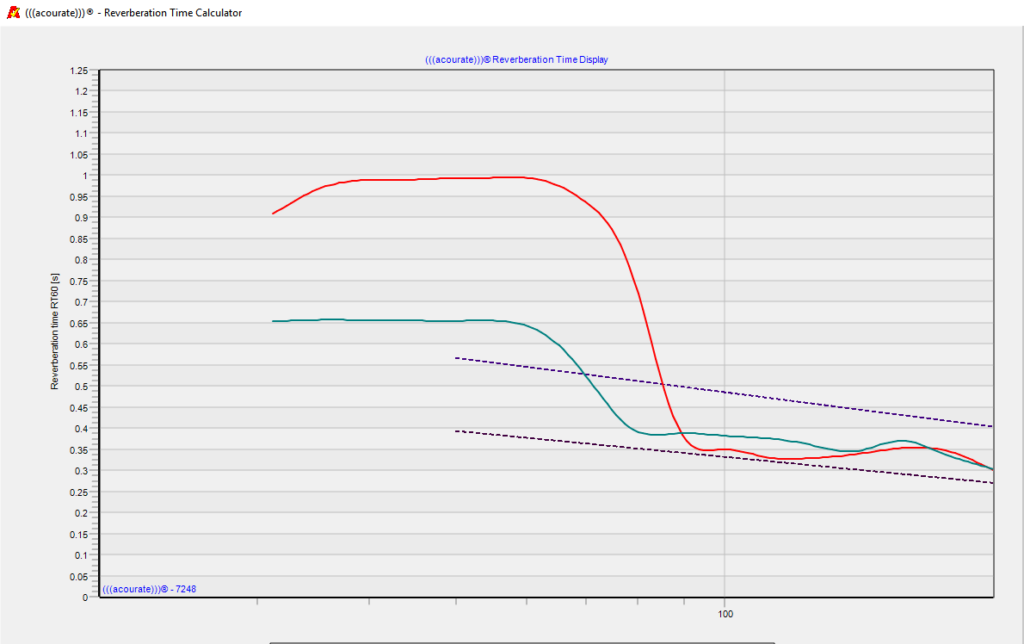
You can clearly see the deterioration in the reverberation time; for my listening room, it should stay within the dashed lines. However, this measurement shows that the AA is basically working.
After various tests and measurement sessions, we had achieved the optimal setup for my listening room. The result exceeded all our expectations.
Conclusion:
Never listen without an active subwoofer again!!! The bass is very tight and comes through with incredible precision. Plus, sounds in the higher frequency ranges are no longer drowned out by a boomy bass and are much easier to hear.