Table of Contents
- Introduction
- Amplifier Design
- Power Supply
- Control of the DHA
- Installation in the Enclosure
- Audiophile Review of the DHA
Introduction
June 6, 2019
Over the years, I’ve really enjoyed listening to music with the HA1 headphone amplifier I built in 2015. First with my old AKG headphones and, since late 2018, with my new Sennheiser HD 800 S. Since I had planned to buy the Sennheiser long before I actually did, and the HA1’s circuitry didn’t match my preferences, I began planning a headphone amplifier for the HD 800 S as early as 2017.
The Sennheiser HD 800 S comes with cables for both balanced and unbalanced operation. That worked out perfectly for me, because I wanted the new headphone amplifier to be designed for balanced operation.
After a thorough analysis of various designs in SPICE, I ultimately decided on a UGS6 module with downstream output stages in an XA.8 topology. I also planned to integrate servo controllers so that I could eliminate the need for coupling capacitors.
On June 16, 2019, the DHA took over the position of my HA1.
Amplifier Design
June 16, 2019
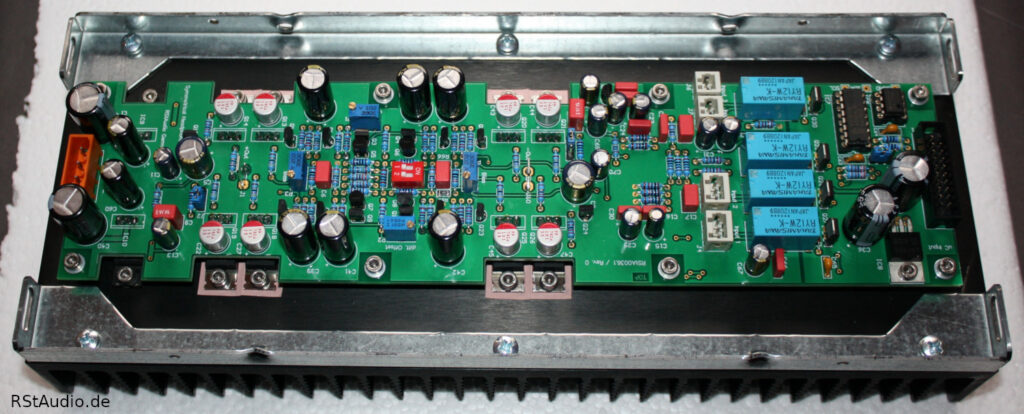
The headphone amplifier is housed in a heat sink enclosure from HiFi-2000. All of the audio electronics for one channel — including the input selector circuit and its control circuitry — are mounted on a circuit board that is screwed onto one of the two heat sinks.
The DHA has two balanced and two unbalanced inputs. Immediately after the unbalanced inputs, a DRV135 balances the signals. The inputs are switched via relays, which in turn are controlled by an I2C port module located on the audio board. The potentials of the analog and digital grounds are strictly separated from one another to prevent interference from the digital electronics.
The balanced input signal is routed to the volume control. For this, I used the MUSES72320 integrated potentiometer from New Japan Radio, which I have preferred for years. Its digital signals are also completely isolated from the digital section by an ADuM3154.
The MUSES72320 is followed by the actual amplifier circuit of the headphone amplifier. This is a discrete, super-symmetrical amplifier consisting of a UGS6 module at the input and two output stages in XA.8 topology. Additionally, two circuit sections are required for setting the quiescent current of the respective output stage; these contain an integrated servo controller that maintains the absolute output offset at 0V. The gain is selectable via DIP switches and is 12dB, 16dB, or 20dB.
An output stage—and each channel naturally has two of them — consists of a push-pull Class AB stage and a single-ended Class A stage using IRF610/IRF9610 TO-220 MOSFETs. The quiescent current per MOSFET is set to 50mA. This results in a power dissipation of 10W per channel, causing the relatively large heat sink to get noticeably warm. The load — that is, the headphones — is connected to the two outputs of the power amplifier and thus has no direct contact with ground (bridge-connected power amplifier).
I can disable the servos to manually calibrate the amplifier’s differential and absolute offset first.
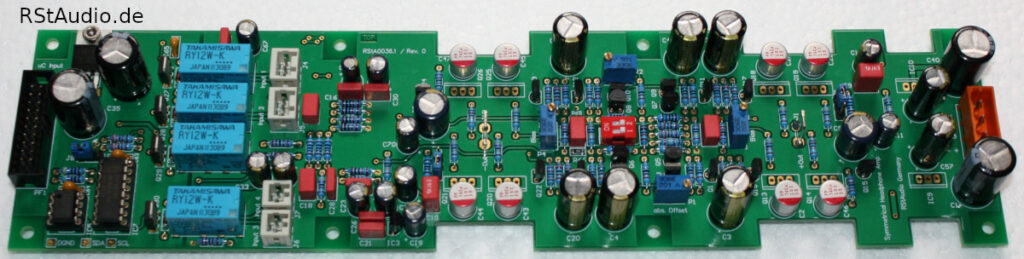
The SMD components (DRV135, MUSES72320, etc.) are mounted on the back of the amplifier board and are therefore not visible in the photos.
Power Supply
June 16, 2019
Just as with the audio circuitry, I made no compromises whatsoever when it came to the power supply; instead, I drew on all my current knowledge of designing audiophile power supplies.
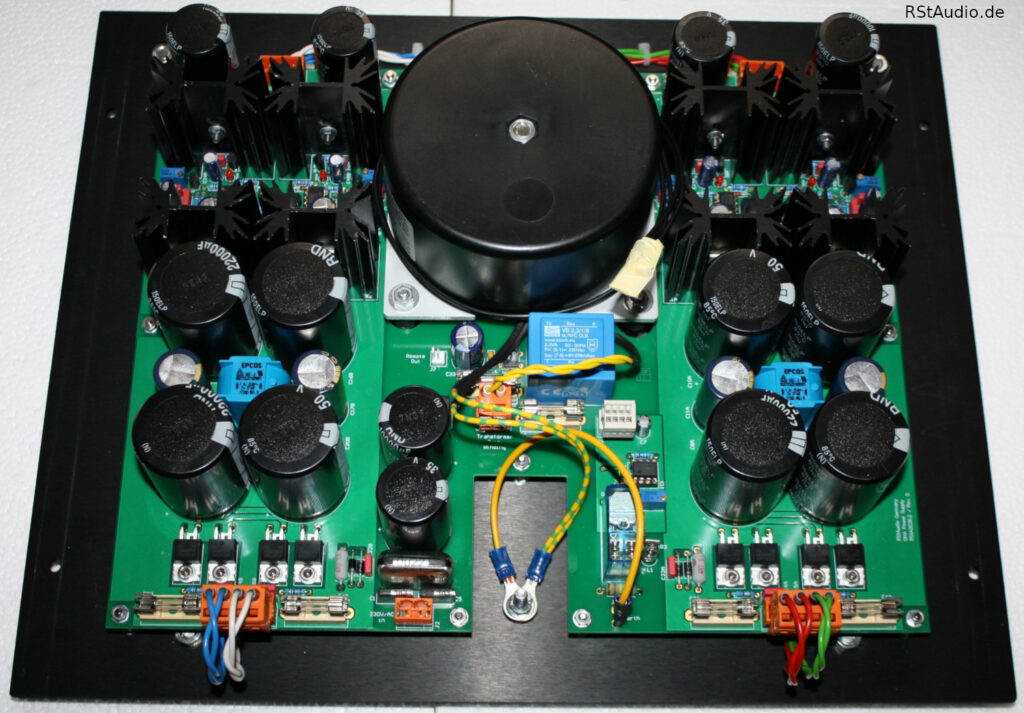
The 230V/AC side begins with a power jack featuring built-in fuses, a power switch, and a power filter from Schurter. The ground wire is connected directly from this jack to the central ground point on the bottom of the unit (an M5 screw). The live and neutral wires go directly to the circuit board, where they are filtered again by three capacitors (Wima MP3 X2 and Y2). This is followed by the DC filter, which filters out any DC components in the mains voltage. After passing through these three filters, the mains voltage reaches the primary winding of the toroidal transformer.
As is usually the case, I use a transformer from Müller Elektrotechnik that was custom-designed to meet my specifications. The transformer has five secondary voltages: four to power the two amplifiers and one for the digital electronics.
The DC power supply for the amplifiers is, of course, designed in a dual-mono configuration, with the exception of the shared transformer.
Two of the transformer’s four secondary voltages are first fed into a snubber network and then into a bridge rectifier with ultra-fast soft-recovery diodes. Following the diodes is a CLC filter with current-compensated chokes and four 22mF electrolytic capacitors. The DC voltages are then further filtered using a capacitance multiplier and subsequently regulated to the desired output voltage of ±25V with extremely low noise by a modified Jung regulator.
The two analog grounds are each connected to ground via a resistor and two diodes connected in anti-parallel.
The board also features a small additional transformer, whose purpose is to provide an unregulated DC voltage for the isolated remote power-on of additional components.
Finally, the board includes a circuit component for determining the correct mains phase. The mains phase is not continuously monitored; instead, the controller uses a relay to switch it on and off. As a result, only a small current flows into the ground for a brief moment. The phase is determined using a glow lamp, which is evaluated by a photoresistor and a subsequent comparator.
Control of the DHA
June 16, 2019
When using the MUSES72320, you must include a microcontroller in the system, as this is the only way to control the chip.
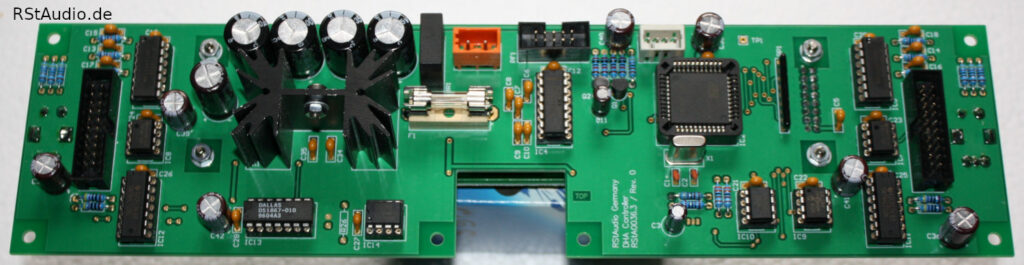
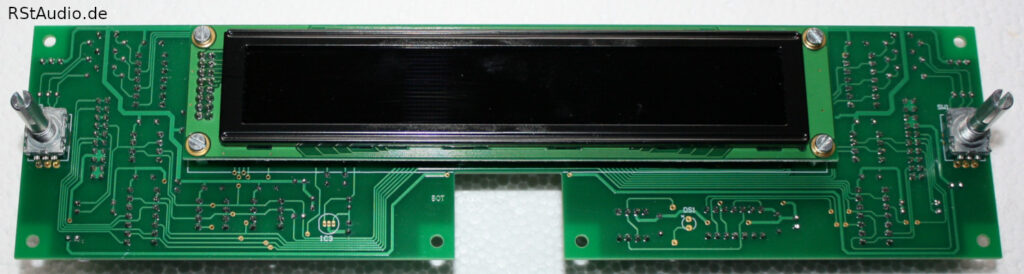
As is usually the case in my designs, the controller board used here features the Atmel AT89C51ED2 controller. The system is operated using two rotary encoders, an RC5 remote control, and a 2×20 OLED display with 9.66 mm-high characters. The board controls the two MUSES72320s and switches the audio relays. It also controls the phase detection, as described above. As a little extra, the brightness of the blue LED indicating mains voltage can be adjusted almost continuously from the controller.
The rotary encoders, OLED, LED, and IR receiver are integrated onto the board, eliminating the need for additional wiring. In addition, the rectification and voltage regulation for the digital system’s power supply are also located on the board.
Installation in the Enclosure
June 17, 2019
As I mentioned earlier, I’m once again using a cabinet from HiFi-2000 — specifically, a Dissipante model that’s 3U tall, 300mm deep, and has a 10mm-thick front panel.
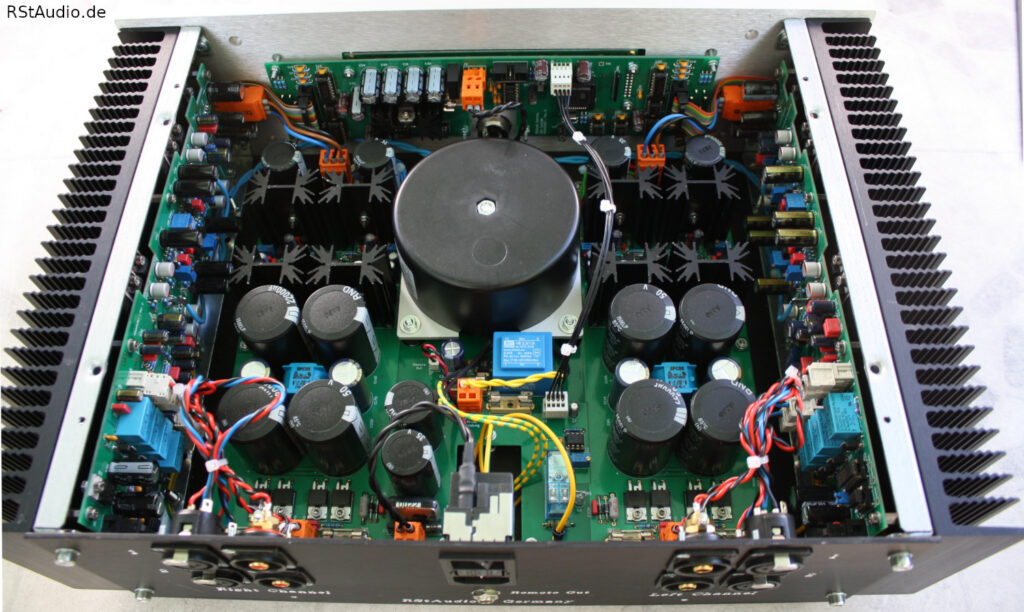
The photo above clearly shows how the four circuit boards were mounted inside the case. The two audio boards are positioned on the left and right of the heat sinks, the controller board is attached to the back of the front panel, and the power supply is secured to the bottom. The transformer is also mounted to the bottom of the case using a mounting plate and rubber pads, which fit into recesses in the power supply board.
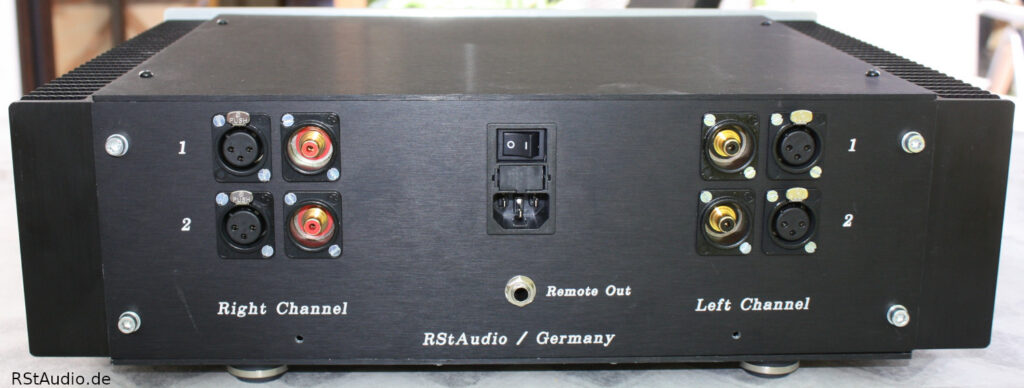
The 230V/AC power connector and the remote output are located in the center of the rear panel. To the left and right of these are the four input jacks per channel (2× XLR and 2× RCA).
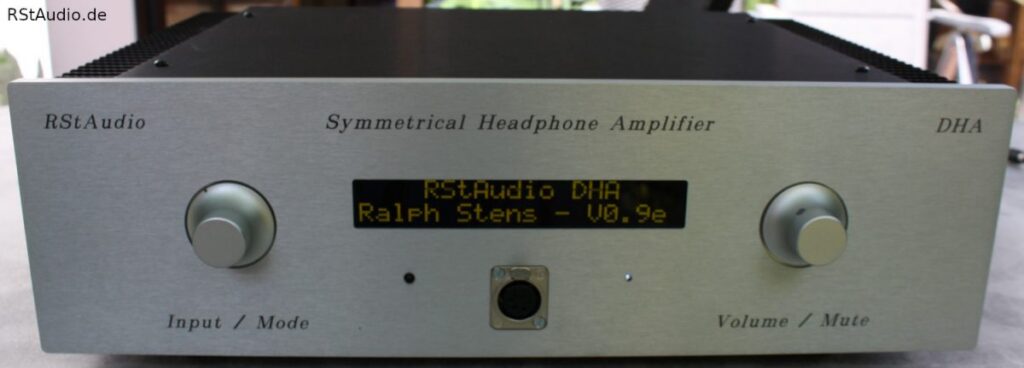
The front panel is shown at the top of this page and follows my standard layout: it features a centrally positioned display flanked by two rotary encoders on the left and right. The front panel of the DHA also houses the headphone output jack (XLR, 4-pin). To the left of it is the IR receiver, and to the right is the power LED.
Audiophile Review of the DHA
June 17, 2019
My first impression was promising. The supersymmetric circuitry works extremely well with the Sennheiser HD 800 S. With this combination, I achieve the exceptional clarity I’m used to from my high-end audio system. However, I won’t be able to give a final assessment until after a break-in period.
August 7, 2019
I’ve been listening to music almost every day for nearly two months now using the DHA paired with Sennheiser HD 800 S headphones, and I have to say I’m absolutely thrilled. The two work together perfectly. Once again, I’ve seen the immense benefits of the SUSY circuit topology. I had high expectations, but the DHA’s audiophile performance exceeded them all. A truly outstanding design!